Terrain Tutorial for UE4

This post will teach you how to create, sculpt, and paint a landscape, as well as use the foliage tool and create your own landscape material in UE4 using materials and textures from an asset pack.
Creating a Landscape:
Start with a level that needs a landscape. Go to the terrain tool (the mountain tab in the 'modes' toolbox), and you'll see this:
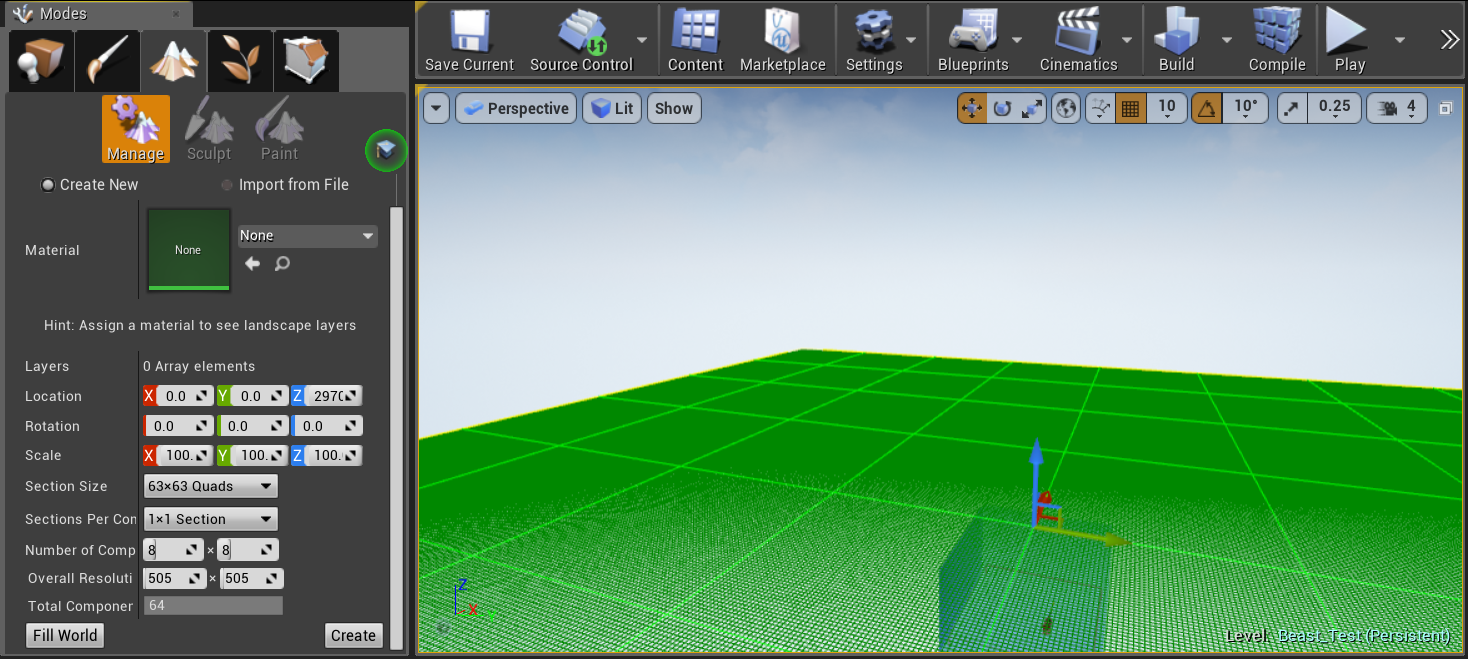
Feel free to mess with the settings, but we're just gonna hit 'create' so we can get something to work with. If you already have a level laid out, just stay on this tab after you create and you'll be able to select, add, and delete individual lots on the landscape.

Now that we have our landscape, we want to assign a material to it.
Creating a Material for your Landscape:
If you're using a landscape material from an asset pack, you can assign it in the details panel, or you can make your own by right clicking in the content browser and clicking "Material." Once you've created this, double click into it. This is the area where we'll create a blueprint that supports material texture layers.
First, right click and type in "constant." Plug this node into "Specular" so that your landscape will not be shiny. NOTE: If you are creating a landscape that will be made of metal, skip this step.
Right click and type in "layer blend," and plug this node into "Base Color." Click on the layer blend node and in the details panel, add as many layers to the array as you have textures (i.e. one for grass, one for dirt, one for rocks, ect.). Name each of these and change the setting to "height blend."


Now, go over to your content browser to where your textures are stored, drag them into the blueprint area, and plug them in appropriately:


Finally, right click and type "landscape coordinates" and drag it into the top left node on each of the textures. Compile and save and your material should be ready to attach to your landscape!
Attach Landscape Material and Generate Layer Info:
Click on your landscape in your World Outliner and then go down to your details panel. Scroll until you see the area for the material and select yours. You may not see any changes, however, as we still have to generate the layer information for each of the textures we added to the material earlier.

Now, go back to the landscape tab in the modes panel and click on the Paint tool. If you scroll down, you should see the texture layers with a "none" label. Again, if you're using a material from an asset pack, this will either already be filled out or you can just click on "none" and plug in the matching layer information. To generate your own layer info, click the plus sign button and follow the prompts.
Once you've generated layer info for your material, I'd suggest saving your project. Now we're ready to start painting onto the terrain! Click and drag on the terrain to paint on all squares and allow the shaders to compile. After this, you'll be able to paint anywhere you want! Play with the brush settings like size and falloff to achieve the look you want on your terrain. You may want to do some sculpting before you paint.

Sculpting your terrain:
In the sculpt section of the landscape tool, you'll find a tool, a brush, and a brush falloff. If you click on the tool icon, you can select the tool that will allow you to deform the landscape. 'Sculpt', 'smooth', 'flatten', and 'erosion' are the most important tools. Experiment with them to see what they do. If you want to sculpt upwards, click and drag the mouse on the terrain. If you want to sculpt downwards, hold down the shift button while you sculpt. The brush and brush falloff settings allow you to change the shape of the brush and how it affects the landscape. Experiment with the settings and challenge yourself to recreate a landscape in a photo as a practice exercise.

Using the Foliage Tool:
Now that you've got your landscape shaped and painted the way you want it, it's time to add another layer of realism with some randomly placed grass, rocks, flowers, and shrubbery. In the Modes toolbox, click on the tab with the plant on it. This is the foliage tool. Much like the paint tool, this will allow you to paint foliage onto your landscape. You can even dictate where the plants appear, on meshes and the landscape or just the landscape. To add plants into the brush, simply drag them from your content browser into the bottom of the tool panel. Don't want to use this flower in this particular brush stroke? Simply uncheck the mesh and paint away! Don't forget to lower the paint density to an extremely low number, or else you'll crash Unreal with the sheer amount of daisies in a 2 foot by 2 foot circle.

You can check "single instance mode" to hand place foliage pieces. If you don't like exactly where UE4 has decided to place a bush (or if you need to correct the fact that it's floating above the ground), click the cursor button on the left of the modes toolbox. This is selection mode, and will allow you to select individual pieces of foliage to translate or rotate.

If you can get that specific, why use the foliage tool? Why not hand place everything? The obvious answer is because that takes way longer. Another reason is because the foliage tool is lighter on processing then individual meshes.
That about wraps it up! You now know the basics of the Landscape tool in UE4! Have fun creating! feel free to show me what you create in the comments below!

Comments
Post a Comment